Our Senior Learning Community students have utilised their Maths & Technology skills & knowledge to create some amazing 3D structures.
Using the SketchUp 3D modelling program, students learnt how to construct basic 3D shapes and then combined them all for their final design.
Exercising their design & creative thinking skills throughout the process, students finished off their creations by adding colour and texture to make realistic structures.
Technology Club is a place where upper primary students can gather at lunch time to explore coding, robotics and all things techy.
During Term 2, some students were busy designing and coding animations and games on their iPads, while other students were challenged to construct a powered vehicle that could carry a soft toy passenger. The vehicle was powered by one or more robotic sphero balls and involved skills and knowledge in design, engineering, maths, science and technology.
Please have a look at our short video to see what fun our students had while they were experimenting and problem solving with their friends.
The central idea behind this year’s PYP Exhibition was
There are major events in history which have impacted on the world and its people.
Our year 7 students researched, prepared and showcased their learning about a significant historical event. ICT played a large part in all of these stages and along with traditional display materials such as books, posters, artifacts and models, digital technology was used extensively during the exhibition performance and showcase. Here are just some of the ways in which ICT was used during the Exhibition process.
Printing information and photos for displays
Nicholas displays photos and information about the bombing of Hiroshima and Nagasaki
Creating an Exhibition Newspaper
A 4 page exhibition newspaper was created in Microsoft Publisher and printed on beige A3 paper to give the old looking effect.
Chloe made a crossword for the back page of the newspaper using a crossword making website.
Visitors enjoyed reading the newspaper which contained an article about each of the historical events that were presented at the Exhibition.
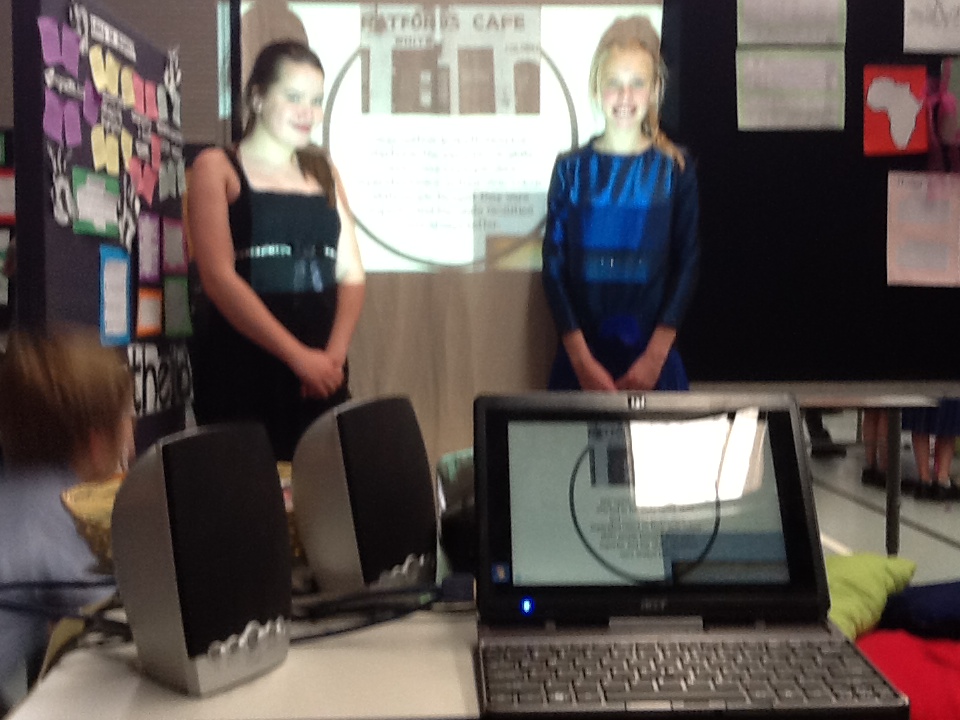
Alicia and Isabel presented their Prezis using a data projector
Macca created a Prezi about Hiroshima and Nagasaki
Campbell created a Prezi about Charles Kingsford Smith
Playing Video and Audio Recordings
Younger students watched videos relating to the exhibits
Olivia displayed information and played an audio recording of Kevin Rudd’s Sorry Day Speech
Kane narrated the events of the Cuban Missile Crisis with images in the background
Sam used his iPod to play an audio recording about World War II
Background Music and Video for the Exhibition Performance
Campbell created an amazing video clip to accompany the entire exhibition performance. It contained backing music, video clips, images, sound effects and strategically placed silences.
Prezi is a web based presentation tool for exploring and sharing ideas on a virtual canvas. The canvas is an open space upon which the user places and navigates between text, images, videos, and other presentation media. Take a look at this short promotional video.
Prezi was an ideal tool to introduce to the Year 7 class as they prepared for their PYP Exhibition. The central idea for this year’s exhibition was
There are major events in history which have impacted on the world and its people.
Students researched and prepared to showcase their learning about a significant historical event. Along with books, posters, artifacts, models, video, soundtracks, music and other display items several students chose to use their Tablet PC’s to display a Prezi presentation of their topic as part of their ‘booth’.
In order to learn the Prezi tool, I gave a short introduction and demonstration of Prezi to all students in the class and links to the following prezi help sheets from their Learn webpage.
The students very quickly learnt how to use the Prezi tools and here are some of the resulting Prezis. (If you wish to view these Prezis on an iPad you will need to download the Prezi Viewer app and then follow the links below).
During term 2, the year 6 and 7 students looked at the central idea of
A person’s behaviour and how they choose to present themselves can project aspects of their identity.
As a slight variation on this idea, and as a good excuse to develop new ICT skills, we spent a session looking at the photo manipulation industry. Photo manipulation is
the application of image editing techniques to photographs in order to create an illusion or deception .. through analog or digital means. (Wikipedia)
With reference to the Wikipedia article, we discussed how the photo manipulation industry has often been accused of promoting a distorted and unrealistic image of self, most specifically in younger people. Some celebrities have taken a stand against photo retouching, declaring the practice detrimental to your health. These include Brad Pitt, Andy Roddick and Jessica Simpson.
This Youtube clip illustrates how Photoshop can be used to perform makeovers on several people’s faces.
To see how easily photo retouching can be done, students used the on-line photo editor pixlr to practice retouching their own school photos. Students learnt how to use :
the smudge tool to remove wrinkles
the dodge tools to whiten teeth
the spot heal tool to remove skin spots and blemishes
the pinch tool to shrink facial features, such as the nose
the bloat tool to enlarge facial features, such as lips
This was a lot of fun and taught the students some useful techniques that can be used to edit other photos as well.
Recently, I talked to the year 7 class about the many uses for recording their own voice, music or other sounds on their tablet, computer or other recording device.
To create narrations for presentations
To create soundtracks for video clips or animations
To practice reading and to listen to themselves reading
To tell a story
To create podcasts
To create read along books for younger students
To record themselves singing
We then had a look at two methods of creating a sound recording here at school.
Windows Sound Recorder
Sound Recorder is a Microsoft Windows accessory that records sound through an internal or external microphone and saves it as a Windows Media Audio (wma) file.
Easi-Speak Microphones.
These portable microphones record sound directly into the microphone’s memory. The recordings (mp3 or wav files) can then be downloaded to a computer by plugging the microphone into a USB port.
We then had a look at the 3 different types of sound files that are produced by these methods (wma, mp3 and wav), how to convert files from one type to another and briefly mentioned how sound files can be edited. For more details about all of these things, please click here.
A screen dump, screen capture (or screencap), screenshot (or screen shot), screengrab (or screen grab), or print screen is an image taken by a computer to record the visible items displayed on the monitor, television, or another visual output device.
A screencast is a digital recording of computer screen output, also known as a video screen capture, often containing audio narration.
We looked at the following methods of taking a screenshot and making a screencast.
Printscreen
Printscreen is a key on your computer’s keyboard that takes a screenshot of the entire screen. The screenshot is placed in the computer’s clipboard and it can then be pasted into a program that supports the insertion of images.
Snipping Tool
The Snipping Tool is a Microsoft Windows accessory and it allows you to take a screenshot of any area of your screen.
Community Clips
Community Clips is a Microsoft program that allows you to make screencasts of what is happening on the screen.
For instructions on how to use these 3 tools, Click here.
Collaborative software and websites help people to work together, sometimes over geographic distances, by providing tools that aid communication, collaboration and the process of problem solving.
During this term, the year 7 class have had a look at few collaborative websites, including Wallwisher, Dabbleboard and Edmodo. The first two sites offer simple ‘walls’ or ‘whiteboards’ for sharing ideas, pictures, videos and documents, whereas Edmodo offers a more sophisticated resource sharing and communication platform (see former post on Edmodo).
Collaborative websites like Wallwisher and Linoit are fun and simple collaborative websites that are great for many primary school year levels. In their simplest form they don’t require each student to have an account and they have a nice graphical interface in the form of a pin-up board with sticky/pinned notes. These sites lend themselves nicely to sharing brief snippets of information, ideas, viewpoints, pictures and so on.
Wallwisher (click to enlarge)
Linoit (click to enlarge)
St Michael’s staff have also had a look at Wikispaces and Google Docs as sophisticated ways of collaborating to share knowledge and to edit documents simultaneously with another user.
Wikispaces (click to enlarge)
Google Docs (click to enlarge)
Click here to view a more detailed document that was prepared for the students and staff about Collaboration and Collaborative Tools.
ICT provides opportunities for the transformation of teaching and learning and enables students to investigate, create, communicate, collaborate, organize and be responsible for their own learning and actions. ICT allows students to make connections and reach a deeper understanding of its relevance and applicability to their everyday lives.
At St Michael’s, the year 7 class has been using the Web2.0 tool Edmodo to practice the 21st century skills mentioned above, especially communication, collaboration and connections.
To quote from the Edmodo website
Edmodo provides teachers and students a secure place to connect and collaborate, share content and educational applications, and access homework, grades, class discussions and notifications. Our goal is to help educators harness the power of social media to customize the classroom for each and every learner.
Edmodo has the look and feel of a social networking website and as such, is an excellent safe tool for engaging students and teaching them about Cybersafety and ethical/legal issues surrounding the access and use of information technologies.
Edmodo is used effectively in the year 7 classroom to
Discuss hot topics, enabling students to practice persuasive writing in a post/reply style format and also to apply ethical principles of etiquette and respect.
Submit journal entries and assignments for teacher comment or marking. Students upload Microsoft Word documents, the teacher adds comments and then the student accesses or downloads the marked document.
Communicate events via a calendar.
Collaborate by uploading documents and website links to a shared library. This is an excellent way to group resources for a particular Unit of Inquiry, ICT skills session or other research activity.
Communicate homework requirements.
Communicate with students who went on the recent exchange trip to our sister school in Fiji.
Do all of the above activities from outside of the school, from any computer with internet access.
Here is an example of a class discussion about war.
As part of the year 6/7 Unit of Inquiry on advertising we had a look at Microsoft Publisher and how it can be used to create various documents useful in the advertising process.
Firstly, we looked at some of the template categories, including:
Advertisements
Business Cards
Catalogs
Flyers
Newsletters
Signs
MS Publisher contains many templates for each of these categories and allows you to specify a colour scheme for each.
We then talked about 3 important elements on these documents
Logos
We looked at some famous logos and discussed their use of colour, shape, symbols and text. We discussed how many of the logos contained very simple shapes and colours.
Colour
We discussed how colour can be carefully selected to help promote the product. Green might represent freshness. Red might represent speed. Yellow might represent French fries (guess which company that might be). Some colours are happy (ie pink, purple & yellow) and others are more solemn (ie black, brown & grey).
Font
Just like colour, the selection of an appropriate font is important. A pretty cursive font might be nice for a florist, a fun font for a children’s product or a plain font for something more serious.
The students were then asked to complete an activity where they created a promotional document for a business or product of their choosing. They used various tools in MS Publisher to complete this task, including:
Templates
Auto shapes
Group and ungroup
Fill colour, line colour
Text Boxes
Font, font style and font size
Order (Bring to Front & Send to Back) to overlap objects

 Our Senior Learning Community students have utilised their Maths & Technology skills & knowledge to create some amazing 3D structures.