Green Screen Weather Reporting

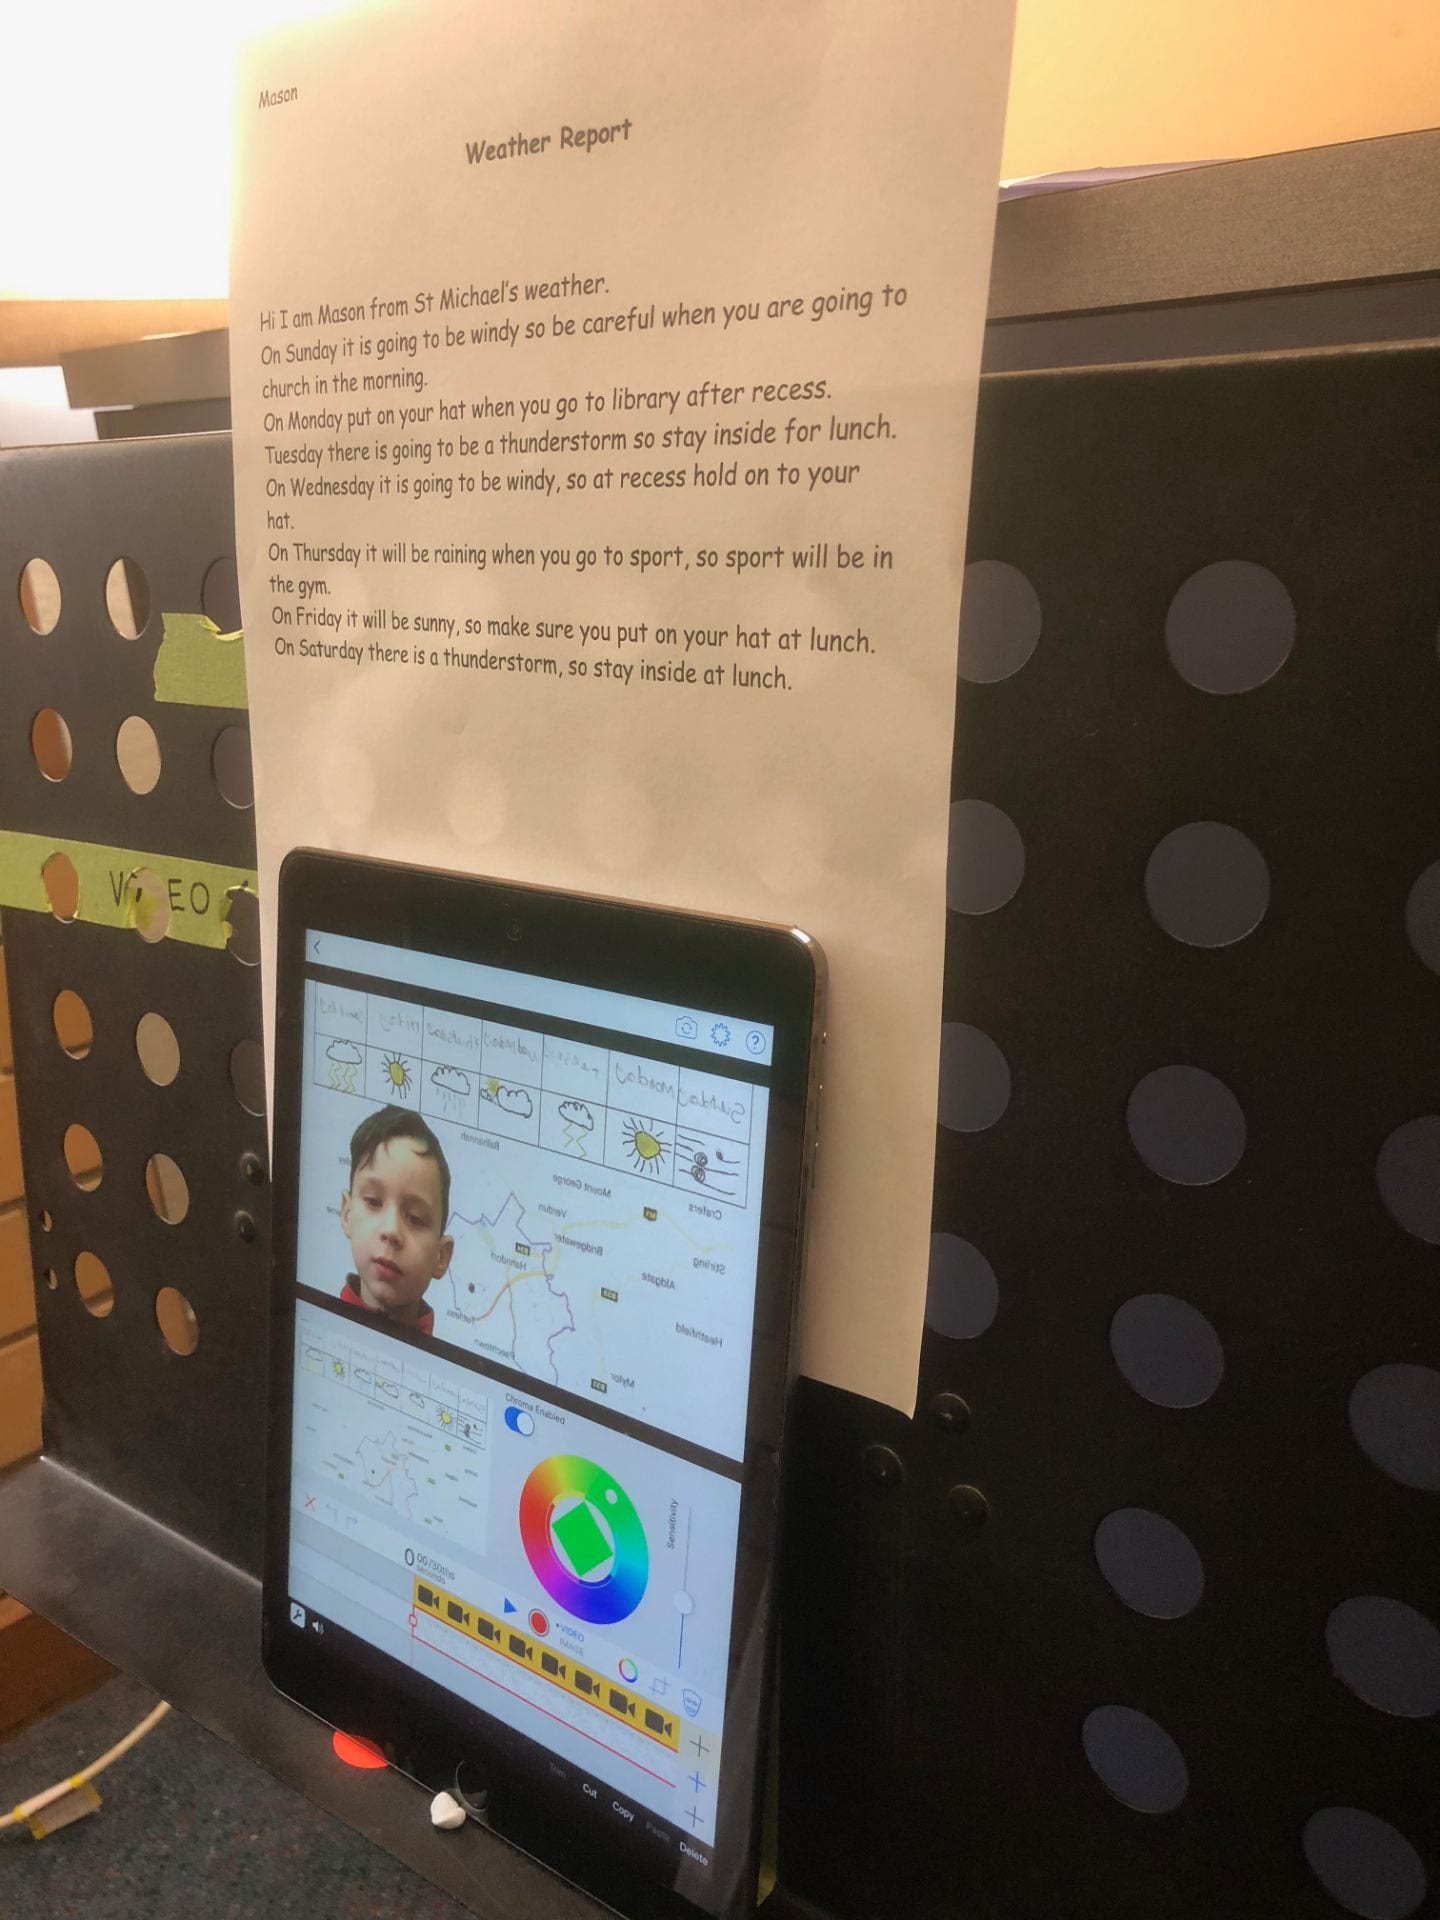
Our BLC students have been learning about weather, seasons and time.

They each produced a weather report for the week by illustrating the weather for each day of the week in the form of symbols and then writing a detailed description of their forecasted weather for each day.

Students then entered our makeshift green screen studio to record their weather report.  We used the Green Screen by DoInk app to achieve this.

Students learned how the green screen technology works and were surprised to see that the image on the iPad screen was different to the plain green wall that they were sitting in front of.


We learnt that if the iPad ‘connects’ to the green screen it means you can see the weather map and not the green screen.  Ollie, Thomas, Scarlett

I learnt that there is such (a thing as) a green screen. Xavier

I learnt that if you wear anything green it will become see through. Naomi


Here are a few of our weather reports.

Katie worked out how to point at each day as she spoke, which was quite tricky because everything appeared back to front on the iPad screen.

After the students had finished recording their weather reports, they watched this video to see how a professional weather man does it.  The learnt that it is actually very similar to how they did it.


Print Friendly, PDF & Email

Year 1 iBook Creators

During term 3 all of our year one students created their own iBooks during their Unit of Inquiry about Story telling.  The central idea for their Unit was

People communicate the past, present and make-believe in different forms of story-telling

The students wrote and illustrated their stories in their exercise books and then used our new iPads to create digital versions.  Of couse, the students were very excited about using the iPads for this purpose and picked up the necessary skills very quickly.

The students used the popular Book Creator app to create their iBooks.  Book creator is a simple and intuitive iBook creator and students were able to easily add titles, text, photos of their illustrations and were able to format them nicely with background colour and different fonts.  When the iBooks were completed the students then used the voice recording facility to record themselves reading the entire book and this was really the icing on the cake.

At the end of the term, the student’s families were invited to come and see and hear the iBooks being presented in the classrooms.  An iPad was connected to the Interactive White Board in the classroom and the students were able to showcase their completed eBook to everyone, using the iBooks app.

Challenges

The Book Creator app was fantastic and the students were easily able to use most of the functionality of the app.  The three main challenges with this exercise were

  1. Helping the students type their story with the on-screen keyboard.  Some had difficulty finding the uppercase letters on the keyboard because most of their handwriting is in lowercase.   (To complicate things further, once they press the uppercase letter on the keyboard it appears in lower case in the text field)
  2. Finding a quite place to record the voice narration.
  3. Sharing the completed iBook with parents who don’t have an iPad, iPod touch, iPhone etc.  iBooks are stored in the .epub format and I was unable to find a suitable .epub reader for Windows.  As a compromise, we sent the parents a pdf version of the story but the limitation with pdf format is that it does not contain any audio.

Examples

Tegan’s iBook

Tegan’s iBook – (Open in iBooks)
Tegan’s Book – (pdf format, no audio)

Will’s iBook

Will’s iBook – (Open in iBooks)
Will’s Book – (pdf format, no audio)

Print Friendly, PDF & Email

Year 1 Digital Stories

During term 3 the two year 1 classes created their own digital stories (videos) as part of their Unit of Inquiry titled

People express their ideas, feelings and culture through stories. 

To create the stories, the students (with help from staff) …

  • Hand wrote their story.
  • Drew the title page and a few illustrations on A4 paper.
  • Scanned the drawings and saved them as image files.
  • Recorded the student’s reading the story using the voice memo functions on the staff’s mobile phones.
  • Created a project in Windows Live Movie Maker.
  • Added a title page, pictures, narrations, music, special effects and credits to the project.
  • Saved the project as a video file ready for viewing by the rest of the class and parents.

Mrs Thelning’s class invited their parents & other family members in to school to view their digital stories.  It was wonderful to see the students showing their work to their families. Not only did they show their digital story that they had put so much effort into, but they also demonstrated their ability to log on, plug in headphones, find files, set the volume and so on. 

Here are some of the student’s digital stories (reduced in size for quicker viewing).

          Esther          Harrison          Jorja             Xavier

Print Friendly, PDF & Email

School blogs & wikis

Well, we’re over half way through 2011 and we’ve managed to get quite a few blogs and wikis up and running in our school this year.  These blogs and wikis fall into several categories, as follows.

1.  Teacher Blogs/Wikis

These blogs/wikis are written and maintained by the class teacher, usually for the junior primary classes.  The teacher uses the blog/wiki to write about the learning activities in their class and usually accompany this with photos and occasionally video.  They upload documents and newsletters to their blog and insert links to websites that may be useful for the students and parents to access at home.  The teachers in these classes are finding that the blog/wiki is a great way of communicating with parents and keeping them in touch with the daily/weekly activities in the class.

Mrs Thelning’s Year 1 Blog
Miss Kreymborg’s Year 1 Blog
 Mrs Norman’s Reception Class Wiki

2.  Class Blogs

These blogs are written by both the teacher and the students.  A classroom blog may contain posts about excursions, sport, units of inquiry and other classroom activities.

Mrs Fudali & Mrs Hall’s “Year 5 Bloggers” Blog

Besides sharing information beyond the classroom, using blogs is a great way for students to improve their ICT skills and get experience using an emerging technology. Students also improve their literacy skills while blogging, and it a fantastic opportunity for students to learn about appropriate online behaviours.

3.  Student Group Blog

A group of keen year 7 writers have created a blog called “Over the Picket Fence”.  In this blog the students write posts containing stories, poetry, book reviews, recipies, random facts, sport, interviews, excursions, random facts, optical illusions, comics, photos and other entertaining reading.  It is a great place for the students to practice their writing skills and learn about the world of blogging.  They are encouraged to comment on each other’s posts and are taught the correct etiquette for writing comments.

Year 7 Writers Group Blog

The staff & students involved in this blog have made a promotional video.  It runs for about 12 minutes and is too large to upload here, but you can click on the following link to see the Over the Picket Fence promo intro.  If you’d like to see the whole video, please contact me.

4.  Year 7 PYP Exhibition Blog

An area that is critical to success in the PYP exhibition is communication.  To assist in effective communication, an exhibition blog/wiki has been established for use by teachers, students and parents.  This blog/wiki  has been set up as a great tool for:

  • Sharing ideas.
  • Recording progress.
  • Communicating amoung students, staff and parents.
  • Displaying information, photos and other media related to the chosen lines of enquiry.
  • Linking to useful websites.

Students will be able to add posts, comments and contribute to group wiki pages.  As the site grows, it will contain heaps of valuable information about the learning & preparatory activities associated with the exhibition.

Year 7 PYP Exhibition Blog 

5.  Staff Blog

The staff blog has been recently set up as a communication and collaboration tool for staff.  It is used to record morning notices, weekly e-bulletins, staff movements and other general information.  It also contains links to useful websites, shared resources, staff information and photos.  It has proved beneficialby being able to access this information from outside of the school and for recording all of this type of information in the one, easy to get to, place.

Staff Blog

6.  Student blogs & wikis

Although we haven’t implemented any yet, student blogs and wikis are a great way for individual students to keep a journal of their learning activities or present information about a particular topic or line of inquiry.


Print Friendly, PDF & Email

Sharing Web Addresses

Do you have a multitude of web addresses (url‘s) that you’d like to share with other teachers, students or parents.  Here are a few ways you could do it.

Hyperlinks

  • Set up a document in Microsoft Word with a list of hyperlinks, as follows.

BookmarksFile

  • To insert a hyperlink, go to the ‘Insert’ menu and select ‘Hyperlink’.  The ‘Insert hyperlink’ dialog box will appear as follows.

InsertHyperlink

  • Simply type in the text that you’d like displayed and the address (url).  If you have recently visited the web page, it will appear under ‘Browsed Pages’.
  • Once the hyperlink is inserted into the document, you can test it by holding down the ‘Ctrl’ key and clicking on the link.  Your browser should then open and the appropriate web page loaded.
  • Save the MS Word document.
  • Finally, select ‘Save As’ and save the document as a ‘Single File Web Page’.  This will create an MHTML document.  You can then copy this document to a central location on a network or e-mail it to selected recipients.  When they open the file, it will open in their web browser, where they can then simply click on the links to navigate to the appropriate web sites.
  • You can also insert hyperlinks into many other applications or into e-mails.

Favourites

  • You may have set up a list of links in the ‘Favourites’ area of your browser (ie Internet Explorer).

  FavouritesArea

  • These links can be exported to a file by going to the ‘Add to Favorites’ menu and selecting ‘Import and Export …’.  A wizard will then guide you through selecting which favourites to export and the location of the export file. 
  •  This will create an HTML document.  You can then copy this document to a central location on a network or e-mail it to selected recipients.  When they open the file, it will open in their web browser, where they can then simply click on the links to navigate to the appropriate web sites.

Links on websites, blogs and wikis

  • If you have your own website, blog or wiki you can insert links in many places.  When inserting a link you simply enter the address of the link, some text to describe the link and whether you would like the link to open in the same window/tab or a new window/tab.
  • If you look in the right hand column of this blog you will see examples of links to ‘School Blogs & Wikis’ and other websites.

BlogLinks

  • Links can also be embedded in the text of a page or post.
Print Friendly, PDF & Email