Learning with Thomas

Year 5 Robot Project

IMG_1230

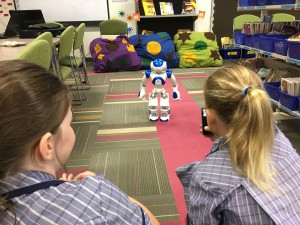
Thomas the NAO humanoid robot returned to our school in Term 1 this year and this time, the Year 5 classes were the main participants in the AISSA Humanoid Robot project.  The focus was to see how the robot could be integrated into the new digital technologies curriculum and what effect it would have on student learning and engagement.

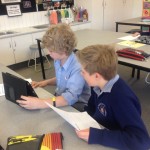
The students learnt how to programme virtual (on screen) robots using the Choregraphe software, which included exploring and using box commands and timelines.  They then thought of a creative scenario where they would need to get Thomas moving – for example, to escape from a jungle, to cross a road or to get a better view at the basketball.  The students were then asked to design an algorithm on paper, using any method they could think of, and then use this algorithm to write a programme to eventually run on the robot.  When complete, students were able to run their project on Thomas and video their work.   Some students did some extension work where they learnt how to make the virtual robot do repetitive movements using the ‘Counter’ box.

The data collected before and after this project showed substantial improvements in the student’s ability to design and write algorithms, to use a visual programming language and to understand programming concepts such as sequence and repetition.  Students commented that it was useful having a real robot to test their projects on because the real robot would sometimes behave differently to the virtual robot because it was a 3D object moving around in the real world.  It was also highly engaging and personable.

This video shows some of this amazing work from our year 5 students.

Year 6 Girls

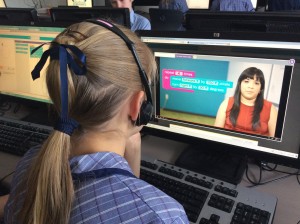
To encourage our year 6 girls to explore STEM subjects, they each had two 1 hour sessions with Thomas.  In the first, they learnt similar programming skills to the year 5 students, using Choregraphe’s box commands and timelines.  They were then able to write a small programme to get Thomas moving or interacting with them.  One group of girls explored voice recognition and branching (conditional) commands.  They programmed Thomas to ask them what their favourite animal was, and then depending on their answer he would give different responses.  This was a real eye-opener for the girls and they could see real-world uses in libraries etc for such technology.

This video shows the girls work and some of the voice recognition projects that they programmed.

Ukelele Club

For a bit of fun, some Year 4 girls helped programme Thomas to sing along with the Ukelele club.  Check it out …


Print Friendly, PDF & Email

Hour of Code

On Monday and Tuesday this week, our Year 4, 5 & 6 classes participated in a world-wide event called the Hour of Code.  The Hour of Code is a global movement by Computer Science Education Week and Code.org reaching tens of millions of students in 180+ countries through a one-hour introduction to computer science and computer programming.

HourOfCode

During the hour, we discussed what coding (or programming) is, what kinds of devices can be programmed and how devices can be programmed.  We talked about some exciting areas where coding is becoming increasingly important, such as robotics, medicine (ie 3D printing of artificial limbs), digital animation, farming, communication and even the fashion industry.

The students then selected one of four online tutorials that introduced programming concepts and extended their skills in coding.  They learnt about commands such as move forward, turn left, turn right, repeat, repeat until, if-then-else and so on.  Using drag and drop blocks, they were able to programme the characters in the activities to draw interesting shapes and patterns or work through mazes and puzzles, dodging obstacles along the way.  They learnt that the ordering of commands is very important and that commands such as repeat can save 100’s of lines of code and make the coding task a lot quicker.

If your child would like to continue with their tutorial at home, or look as some other excellent activities please see the Hour of Code page on this blog by clicking here or go to https://code.org/learn

Year 4s – We did the Hour of Code

Print Friendly, PDF & Email

Maths Fun with Pro-Bot

Pro-Bot


Some of our Year 5 and 6 students have been programming our floor robot “Pro-Bot” to draw shapes.  By using their prior knowledge of regular polygons and angles, they determined that they have equal length sides and that the sum of the external exterior angles is 360%.


The students constructed algorithms to draw a variety of shapes and then programmed Pro-Bot to draw them.  After testing their programme, they inserted a coloured pen into the robot and the robot then drew the shape on paper.  Here are some of the results from the year 5 girls robotics group.

And here are some of our year 6 students in action.

Yr6 - Programming Pro-Bot to draw shapes

Pro-Bot

From Pro-Bot Robotics manual by Terrapin Software


Print Friendly, PDF & Email

Safer Internet Day Promises

Primary-Assembly-SID15 Title

The theme for Safer Internet Day 2015 was “Let’s create a better internet together”.  Safer Internet Day is coordinated by the UK Safer Internet Centre and it aims to promote the safe, responsible and positive use of digital technology for children and young people.  The day offers the opportunity to highlight positive uses of technology and to explore the role we all play in helping to create a better and safer online community.

During Term 1, the Year 5 classes explored this concept over several weeks and discussed the responsibility we all have to help create a kinder online community.  They produced the following video titled “Safer Internet Day Promises“.

Click here to watch on SchoolTube

Print Friendly, PDF & Email

Rap IT

GarageBandDuring Creative Arts last term our year 3 and 5 students looked at the basic structure of lyric writing and music composition using digital technology.  Their summative task was to write their own lyrics for a rap song on a chosen topic and then use the Garageband app to create their backing music and record their lyrics.

Students learnt about the structure of a rap song and music recording concepts such as time signature, tempo, bars and count-in.

The students selected ‘Apple Loops’ from the Garageband app as their backing music tracks and were encouraged to gradually build up the tracks at the beginning of the song and gradually fade them out at the end. Here are some examples. The picture is a screenshot from the Garageband project, showing the individual tracks and the build up and fade out of each. If you click on the picture, you can listen to the rap.

Sweets – by Isabella and Tegan

Footy – by Oliver and Sam

Chocolate – by Chloe and Eliza

Maths – by David and Macca

More information

The instructions the students followed to create their rap song in Garageband can are available in this document – GarageBand – Making a Rap Song.


Print Friendly, PDF & Email

Let’s Create a Better Internet Together

Safer Internet Day 2014 LogoDuring the week of Tuesday 11th February, students in Year 4, 5 and 6 participated in Safer Internet Day 2014 through Cyber safety workshops held in their classroom. The theme for Safer Internet Day this year was “Let’s create a better internet together” and students discussed the responsibilities that they can take to make the internet a better place.

We discussed how it is not one person’s responsibility to make the internet better, but everyone’s.  Young people, parents, educators, industry and politicians can all contribute to the main aim of fostering the positive and eliminating the negative online.

Students watched the following video from the Safer Internet Day website, and then discussed how the images and lyrics related to challenges that they may face when using the internet.

Finally, the students were asked “What are some rules that everyone should follow to help make a better internet for everyone”.  Here are the responses from one of the year 5 classes that they posted to a collaborative wall on the lino website.

5HS Cybersafety Wall

For more information about Safer Internet Day and Cybersafety, visit the following websites and resources.

Print Friendly, PDF & Email

Year 5 Advertisements

Last term, as part of their Unit of Inquiry on advertising, the two year 5 classes made 30 second commericials in Windows Live Movie Maker.  The process they followed was basically the same as last year, as described in my April 2011 post Making advertisements with Windows Live Movie Maker.

Here are some of this year’s advertisements.  Click on the image heading to play the video on your computer’s media player.

Power Blast

Shampow


The Ripper

Tutti Fruity

Print Friendly, PDF & Email

School blogs & wikis

Well, we’re over half way through 2011 and we’ve managed to get quite a few blogs and wikis up and running in our school this year.  These blogs and wikis fall into several categories, as follows.

1.  Teacher Blogs/Wikis

These blogs/wikis are written and maintained by the class teacher, usually for the junior primary classes.  The teacher uses the blog/wiki to write about the learning activities in their class and usually accompany this with photos and occasionally video.  They upload documents and newsletters to their blog and insert links to websites that may be useful for the students and parents to access at home.  The teachers in these classes are finding that the blog/wiki is a great way of communicating with parents and keeping them in touch with the daily/weekly activities in the class.

Mrs Thelning’s Year 1 Blog
Miss Kreymborg’s Year 1 Blog
 Mrs Norman’s Reception Class Wiki

2.  Class Blogs

These blogs are written by both the teacher and the students.  A classroom blog may contain posts about excursions, sport, units of inquiry and other classroom activities.

Mrs Fudali & Mrs Hall’s “Year 5 Bloggers” Blog

Besides sharing information beyond the classroom, using blogs is a great way for students to improve their ICT skills and get experience using an emerging technology. Students also improve their literacy skills while blogging, and it a fantastic opportunity for students to learn about appropriate online behaviours.

3.  Student Group Blog

A group of keen year 7 writers have created a blog called “Over the Picket Fence”.  In this blog the students write posts containing stories, poetry, book reviews, recipies, random facts, sport, interviews, excursions, random facts, optical illusions, comics, photos and other entertaining reading.  It is a great place for the students to practice their writing skills and learn about the world of blogging.  They are encouraged to comment on each other’s posts and are taught the correct etiquette for writing comments.

Year 7 Writers Group Blog

The staff & students involved in this blog have made a promotional video.  It runs for about 12 minutes and is too large to upload here, but you can click on the following link to see the Over the Picket Fence promo intro.  If you’d like to see the whole video, please contact me.

4.  Year 7 PYP Exhibition Blog

An area that is critical to success in the PYP exhibition is communication.  To assist in effective communication, an exhibition blog/wiki has been established for use by teachers, students and parents.  This blog/wiki  has been set up as a great tool for:

  • Sharing ideas.
  • Recording progress.
  • Communicating amoung students, staff and parents.
  • Displaying information, photos and other media related to the chosen lines of enquiry.
  • Linking to useful websites.

Students will be able to add posts, comments and contribute to group wiki pages.  As the site grows, it will contain heaps of valuable information about the learning & preparatory activities associated with the exhibition.

Year 7 PYP Exhibition Blog 

5.  Staff Blog

The staff blog has been recently set up as a communication and collaboration tool for staff.  It is used to record morning notices, weekly e-bulletins, staff movements and other general information.  It also contains links to useful websites, shared resources, staff information and photos.  It has proved beneficialby being able to access this information from outside of the school and for recording all of this type of information in the one, easy to get to, place.

Staff Blog

6.  Student blogs & wikis

Although we haven’t implemented any yet, student blogs and wikis are a great way for individual students to keep a journal of their learning activities or present information about a particular topic or line of inquiry.


Print Friendly, PDF & Email

Solarschools website

Today Mrs Fudali’s year 5 class had fun exploring the solarschools website.  This site contains live data that is downloaded every half hour from our school’s PV system.   (See my post titled Solar Energy Monitoring).

Solar panels

Firstly the class ventured out into the sunshine to search for and look at the solar panels on top of the year 1/2 building.  We counted the number of panels and the factors that affect the amount of electricity that is generated each day.  We then went to the computer room, where the students accessed the website and searched for answers to the questions on this Solarschools worksheet that I prepared for them.

Print Friendly, PDF & Email

Making advertisements with MS PowerPoint

As part of their Unit of Inquiry on advertising, the year 5s and 6s have been making 30 second commercials (see post titled Making advertisements with Windows Live Movie Maker.)  As well as using video clips taken from a video camera, some students chose to incorporate video clips that were created from an animated MS PowerPoint presentation.

To create animations (moving objects) in MS PowerPoint, the students followed these steps :

  1. Add text, shapes, pictures, clip art etc to the presentation as usual.
  2. Select one or more of the above objects and select the “Animations > Custom Animation” option.
  3. Select “Add Effect > Entrance”.  This sets special effects for the way the object enters the presentation.  Some examples include “Fly In”, “Spiral In” and “Checkerboard”.
  4. Select “Add Effect > Emphasis”.  This sets special effects that occur on the object after it has entered the presentation.  Some examples include “Grow/Shrink”, “Spin” and “Blast”.
  5. Select “Add Effect > Exit”.  This sets special effects for the way the object leaves the presentation.  Some examples include “Fly Out”, “Dissolve Out” and “Wheel”.
  6. Steps 3 to 5 can be repeated for many objects or groups of objects and the timing, movement and sequence of the animations can be specified.

The result is a self running presentation.  The presentation can then be converted to a video file, such as an “avi” file, using a separate program such as Wondershare PPT2Video Pro.  This video file can then be imported into Windows Live Movie Maker along with other video, image and audio files.

Print Friendly, PDF & Email